Posts

Showing posts from February, 2020

Override OSGi Component Properties

Image
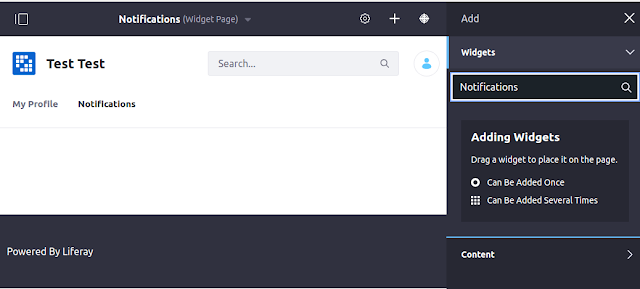
Override OSGi Component Properties Overview You may need to change some properties for Liferay's OSGi  @Component  in order to customize the built-in behavior, but you don't want to override the whole component. Fortunately, there is an easy way to achieve this. This article will explain how to do this. Sample scenario Let's say, you want to add the "Notifications" portlet to a user profile page. But when you try do this - you can't find this portlet among the available ones: When you check the sources - you'll find out, that "Notifications" portlet is hidden: Obviously, you just need to change the display category. But this is the internal Lifeay code, which you can't just modify. Fortunately, all those properties are easy customizable. Here are the required steps: Create a  [Component-Classname].config  class in  [Liferay]/osgi/configs  folder; Add properties you need to override inside the created file; Restart Lifer

Gradle workspace: dependencies and modules management

Gradle workspace: dependencies and modules management Overview This article explains how to manage dependencies in your Gradle workspace project, use global dependencies, define configuration, and filter sub-modules. Dependencies management If you have a multi-module project - you probably have a lot of common dependencies in your modules, and you want to reuse them from a single place. This way you'll not need to update a single dependency version in tens of modules, but just update it in one place. The dependencies in your modules can be different: Liferay dependencies  - those ones, exposed by Liferay; Third-party dependencies  - not defined in Liferay. And approach is different for those types. For Liferay dependencies - you can enable  The Target Platform . For third-party ones - you may use global dependencies. Global dependencies You may define global dependencies in the root of your workspace, and then reuse them in different modules. Create f

Liferay Target Platform

Enabling the Target Platform What is the Target Platform? Target Platform is a set of Maven's BOMs, which define all the exposed artifacts (Liferay's and third-party ones) in a specific Liferay version. Those BOMs are listed  here . Why we need it? You need target platform for dependencies versions management: this way you don't worry about the specific library versions, and just use the ones Liferay exposes. For example, when you use target platform - Gradle dependencies, like: compileOnly group: "com.liferay.portal", name: "com.liferay.portal.kernel", version: "4.4.0" compileOnly group: "com.liferay", name: "com.liferay.journal.api", version: "4.2.0" compileOnly group: "com.liferay", name: "com.liferay.journal.service", version: "5.0.18" compileOnly group: "com.liferay", name: "com.liferay.dynamic.data.mapping.api", version: "5.2.0" will

Creating Themes for Liferay 7.3

Image
Building Theme for Liferay 7.3 Overview This article describes how to create, build and deploy a theme for Liferay 7.3 Prerequisites You should have Liferay 7.3 (with Liferay workspace) and Node (v10.x+) installed already Theme Creation Navigate to [project_root]/themes folder in terminal ([project_root] - root folder of your Liferay workspace project). Install   generator-liferay-theme   globally: npm i -g generator-liferay-theme Check   https://www.npmjs.com/package/generator-liferay-theme   for more details Install Yeoman ( https://yeoman.io/ ) globally: npm i -g yo Create the liferay theme with   yo liferay-theme   command: Answer required questions: define theme name and ID, choose deployment strategy (Local App Server), Liferay version (7.3) and site url ( http://localhost:8080 ) Theme Build and Deployment Navigate to created theme folder: cd demo-liferay-theme Install Gulp ( https://gulpjs.com/ ) with npm: npm install gulp Run   npm audit

Manual JDK Installation on Linux

Manual JDK Installation on Linux You may install JDK with   sudo apt-get install   command, but in this case you don't control which exactly version will be installed. If you need specific version (for example, "jdk1.8.0_144") - it's better to install it manually. Here are simple steps for this: Download JDK version you need from the official web site:   https://www.oracle.com/technetwork/java/javase/downloads/index.html Unpack it (for example, to   /opt/java   folder) Create symbolic links for   java   (and also for Java compiler - javac , and Java Web Start -   javaws ): Go to   /usr/bin   folder: cd /usr/bin/ Check if there are already sym links: ls -al | grep java Remove old symbolic links (if they exist): sudo rm -Rf java sudo rm -Rf javac sudo rm -Rf javaws Create new symbolic links to required Java version: sudo ln -s /opt/java/jdk1.8.0_144/bin/java java sudo ln -s /opt/java/jdk1.8.0_144/bin/javac javac sudo ln -s /opt/java/jdk1.