Posts

Showing posts from April, 2020

Public JAX-RS Application Implementation

Image
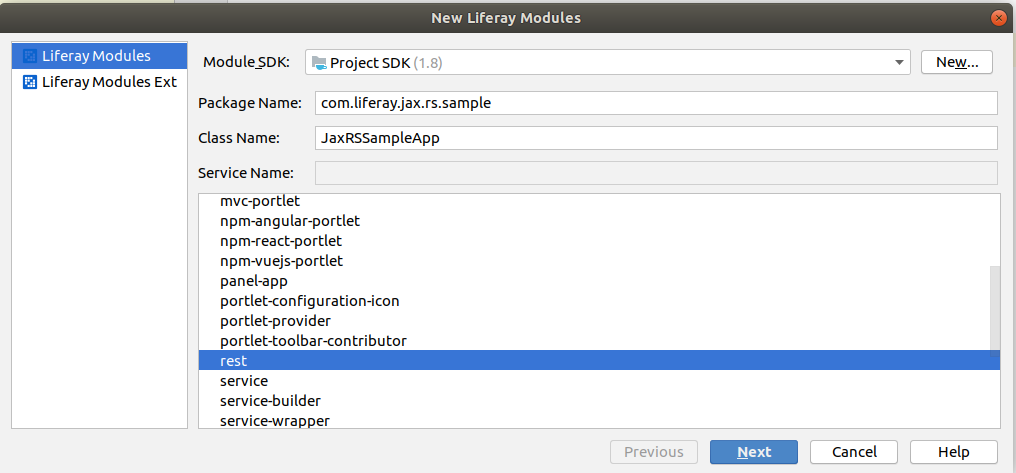
Public JAX-RS Application Implementation Overview This article will explain how to create a JAX-RS REST application, which will be publicly accessible.  Prerequisites  Create a Liferay Gradle Workspace with a Target Platform enabled. JAX-RS Module Implementation Create a new ‘rest’ module: Created module structure:   bnd.bnd file: Bundle-Name : liferay-jax-rs-sample Bundle-SymbolicName : com.liferay.jax.rs.sample Bundle-Version : 1.0.0 Liferay-Configuration-Path : /configuration build.gradle file: dependencies {   compileOnly group: "javax.ws.rs" , name: "javax.ws.rs-api"    compileOnly group: "org.osgi" , name: "org.osgi.service.component.annotations"    compileOnly group: "org.osgi" , name: "org.osgi.service.jaxrs" } Once you deploy sample generated JAX-RS application, and try to access it by URL http://localhost:8080/o/greetings - you’ll see the “Access denied” error:   

Creation Resources Available for Guest Users

Image
Creation Resources Available for Guest Users Overview If you implement a public web-site on Liferay, you need it’s content to be publicly available. By default, when you invoke the Liferay API to create some resource (document, web content, etc.) - it’s not created in such a way. But it’s easy to make it work.  Implementation When you invoke the Liferay API to create some resource you need - you’ll notice it accepts the ServiceContext object.  To make the resource available for Guest user - use:   serviceContext.setAddGuestPermissions( true ); To make the resource available for Site Members - use:  serviceContext.setAddGroupPermissions( true ); This is a sample code for File Entry: ServiceContext serviceContext = new ServiceContext(); serviceContext.setUserId(userId); serviceContext.setScopeGroupId(groupId); if (setViewPermission) {   serviceContext.setAddGroupPermissions( true );   serviceContext.setAddGuestPermissions( true ); } FileEntry fileEnt

Asset Publisher Widget Template: scoping front-end code to a portlet instance

Asset Publisher Widget Template: scoping front-end code to a portlet instance Overview Sometimes you need to implement some Javascript and CSS code inside your Asset Publisher Widget Template. It may work properly, but it may be broken when you add a second instance of Asset Publisher with the same Widget Template. This article will show how to "scope" your Javascript/CSS code to the portlet instance only. Fetch the portletId First you need to fetch the portletId in Freemarker code of your Widget Template: <#assign       portletId = themeDisplay . getPortletDisplay (). getId () /> Adjust the Javascript code Now that you have the portletId, you may use it to fetch the portlet container and bind any javascript events inside it, sample: $( document ). ready ( function () {     var portletId = " ${ portletId } " ;     var $container = $( "#portlet_" + portletId );        //todo: bind all events to container, sample:    /*

Debugging JSPs in a JSP Fragment Module

Debugging JSPs in a JSP Fragment Module   If you're working on a JSP Fragment module, you'll probably want to debug all these endless scriptlets on the JSP you're trying to customize. By default, debug is not working for them (IntelliJ IDEA), but, fortunately, it's easy to make it work - just add the following lines to the bnd.bnd file of your module: -jsp : *.jsp,*.jspf -metatype : * -plugin.jsp : com.liferay.ant.bnd.jsp.JspAnalyzerPlugin -plugin.resourcebundle : com.liferay.ant.bnd.resource.bundle.ResourceBundleLoaderAnalyzerPlugin -plugin.sass : com.liferay.ant.bnd.sass.SassAnalyzerPlugin -sass : * Enjoy 😏