Auto-translation with MS Translator
Auto-translation with MS Translator
in Liferay 7.2
Liferay 7.2 comes with auto-translation feature and uses MS Translator to translate language keys to supported locales.
Step 1 - Obtain subscription key
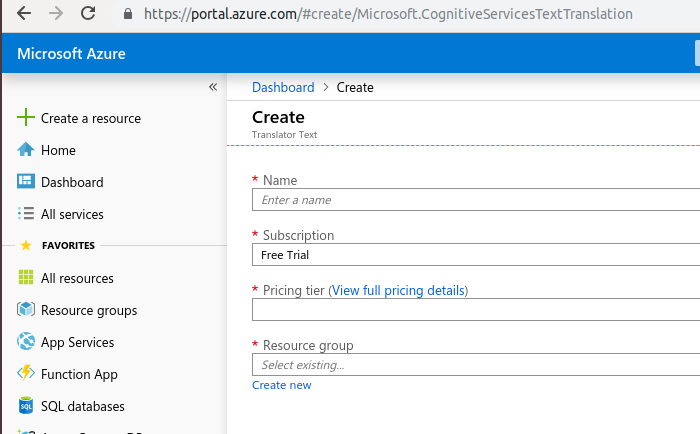
2) Create new “Translator Text”:
3) Copy the subscription key:
Step 2 - Prepare files to translate
Create module for resource bundle:
Make sure, you have Language.properties under /src/main/resources/content location with required keys to be translated.
Step 3 - Configure Gradle plugin
Include ‘buildLang’ plugin and specify subscription key (from step1) in build.gradle:
dependencies {
compileOnly group: "com.liferay.portal", name: "com.liferay.portal.kernel"
compileOnly group: "org.osgi", name: "org.osgi.service.component.annotations"
compileOnly group: "com.liferay.portal", name: "com.liferay.util.taglib"
compileOnly group: "javax.portlet", name: "portlet-api"
compileOnly group: "javax.servlet", name: "javax.servlet-api"
compileOnly group: "jstl", name: "jstl"
compileOnly group: "org.osgi", name: "osgi.cmpn"
}
buildscript {
dependencies {
classpath group: "com.liferay", name: "com.liferay.gradle.plugins.lang.builder", version: "3.0.12"
}
repositories {
maven {
url "https://repository-cdn.liferay.com/nexus/content/groups/public"
}
}
}
buildLang {
translateSubscriptionKey = "<SUBSCRIPTION_KEY>"
}
Step 4 - running translator and checking results
Run ‘buildLang’ Gradle plugin:
Expected result:
Language files with translations should appear.
For translated keys “(Automatic Translation)” suffix will be added, for those, which were not translated - “(Automatic Copy)”.
Finally, you can verified translations manually (better with native-speaker), and then remove “(Automatic Translation)” suffix from language translations.

Comments
Post a Comment